Introduction
Node – in simple words: a server, a remote (or not) “computer” on which special software is installed. Once we have rented and configured the remote server, we get a node that communicates with other participants (nodes) of the network and stores, sends and receives information about its transactions.
Decentralization is primarily necessary to ensure a high level of network security. Each transaction is confirmed by several independent nodes (nodes), which makes it impossible to spoof data.
The event where we “raise” the nodes is called in common testnet, sometimes event. Test participants are called testers.
Rewards for participation in the testnet
In gratitude for the work done and the data provided to the development team, they can thank us, the testnet participants, with some coins. It is worth noting that there are several types of testnets: rewardable and non-rewardable.
If in the first case, we know exactly how many coins, when and under what conditions we will get, then the second type of event implies gratuitous help. For the sake of fairness, I should say that not always rewarded testnets pay. Exactly as projects that have not announced any rewards can thank participants with some amount of coins.
Most often, the coin or token of the product being tested is not traded on exchanges or DEX and therefore has no price. Sometimes, but less often, the project team continues to test their product after listing and as a reward we get tokens that already have a certain price.
It should be understood that:
– the project may not pay anything out, even if promised;
– the project may pay even if it has not promised to do so;
– the project may pay with tokens that will be worth absolutely nothing for some time;
– the project can pay with tokens that are already traded and have a real price.
At first glance, it may seem that it makes sense to participate only in rewarding testnets, where the project’s coin is already traded and has a real price. But, as practice shows, the reward in such events is much lower than if you test a newly created product.
When a coin is traded at a notional dollar and you’re told, “Each participant of the testnet will get 100 coins,” you realize, “Okay, I’ll get $100.”
When a coin isn’t worth anything (not traded on exchanges) and you are promised the same 100 coins, in a month or two when the project enters the market with its product and, therefore, coins, each may be valued at $0.001, $0.2, $1, $100 and so on.
Working with projects that have their own coin with a certain value is the “here and now”. Working with a newly launched project and a young team is, first of all, a risk (no one guarantees that the team will bring their product up to dissapear).
Costs of participation in the testnet
To “lift” a node (in addition to the desire and free time), you need to have the hardware, where to maintain the node. If you respect your computer, you won’t turn it into a node.
We need a server (a remote “computer”), which will be noisy somewhere far away and for which nobody will worry. The price of renting such a “computer” depends on its characteristics.
The required characteristics for each node depend on the project. The average cost of renting one server for one node ranges from $5 to $50 per month. There are projects that require more expensive equipment, such as video cards. Then the price tag for a server rental rises to $ 200-300 per month.
Many beginners testers use free servers from Amazon or Google Cloud, this too should be considered.
The method works only on those hosting where the server of the right capacity can survive at least a month, preferably 2. But keep in mind that when working on large 10-15 used servers, you need to constantly maintain the nodes themselves, update them, raise them regularly, and so on.
For Amazon AWS server configuration 8 CPU 32 RAM can last a month or two, but that’s if you’re lucky and can register your account correctly.
For Linode registration is a bit more complicated, you need to consider a lot of nuances to bypass the fraud and successfully confirm the account registration. But if you can register the account you will get a server with 6 CPU and 16 RAM which lasts 25-30+ days.
Real profits for participating in the testnet
With average rewards is more difficult. The most paltry reward I received did not even recoup the cost of renting a server. “Iris” – the reward we got was a coin that was already trading at the time of the testnet.
At the same time, my highest reward could be measured in used 2015 Mustangs. “Hopr” – was a non-rewarding testnet without a tradable coin, but a penny, contrary to the conditions, still got it. I can’t help but mention one of the most “fat” tesnets – “Mina Protocol”, where at the moment the value of accounts that got into genesis is measured in “lambas”.
A decent part of the testnet, in principle, does not pay for itself. But come across a “gem” once a year, once every six months, is quite likely.
How to find a testnet for participation?
In order to participate in testing more or less strong projects, I suggest adding sites like dropsearn.com to your bookmarks. You’ll increase your chances of “getting in for a tasty dinner and snagging a piece of the pie” by taking part in these events presented on these resources.
We test cryptocurrency projects, specializing in “raising” and content nodes. As a reward, we can be patted on the shoulder, given a cap or a “lamp”. It is worth it or not, think for yourself. If you still dare to try “nuderness”, then I present to your attention 2 more introductory sections, after reading which you can raise your first node.
The most important thing here is to immerse yourself in the atmosphere and become part of the community.
How and where to rent a server for a node?
If you have already chosen your first project, in the testing of which you want to take part, then the first thing you need to decide – with the technical characteristics of the server. The hardware requirements can always be found in the official documentation of a node installation.
I classify iron requirements for nodes into 2 types:
– A weak VPS (virtual private server) will do;
– I need a powerful DS (dedicated server).
If I need a server with 1 CPU, 1GB RAM, 50GB HDD to 8 CPUs, 32GB RAM, 512GB SSD, I will choose a VPS. If I need 1 Terabyte of space or more than 32GB of RAM, I will choose DS (dedicated server).
In this education course the terms VPS and DS are used only for reference and to make a rough distinction. In most cases, a relatively cheap VPS will do for us. “2 cores, 4GB RAM and 50GB SSD” – can be considered as standard hardware requirements. Less often 8 or more cores and 16 or more RAM are required.
What is the difference between VPS, VDS and DS?
Let’s look at what kinds of servers there are, what are the differences, advantages and disadvantages? Where can I rent a server for a reasonable price, as well as how not to get banned from hosting?
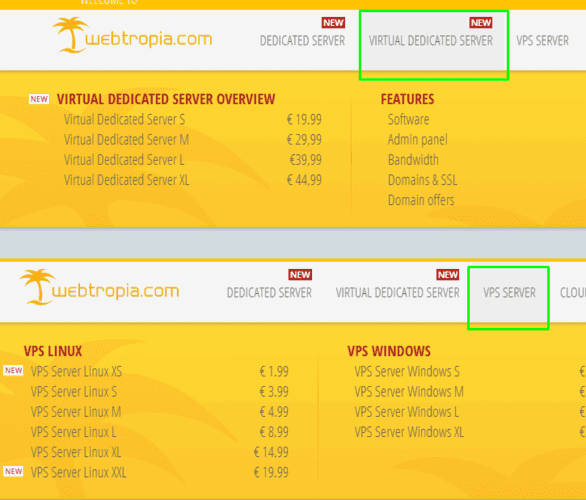
Virtual private server (VPS) as well as virtual dedicate server (VDS) – the service of renting a so-called virtual dedicated server. In terms of operating system management for the most part it corresponds to the physical dedicated server. In particular: root access, custom IP-addresses, ports, filtering rules and routing tables. Important note: it is not possible to deploy Docker on a VPS.
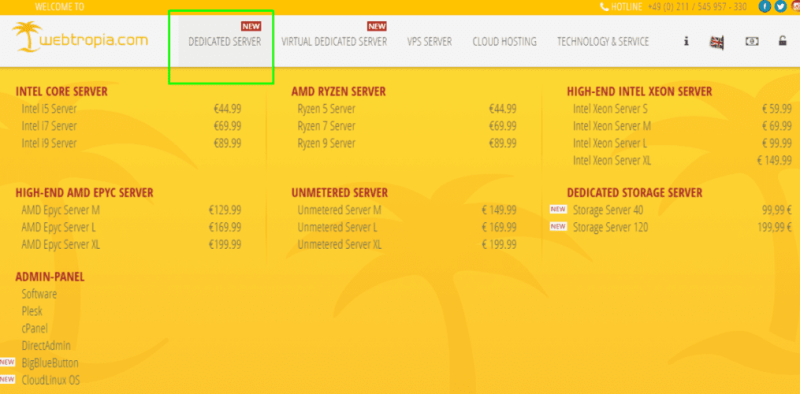
Dedicated server (DS) is a type of hosting where the client is provided with a separate physical machine in its entirety. Typically used to run applications that cannot coexist on the same server with other projects or have higher resource requirements.
VPS – the cheapest type of server rental, but usually with limited traffic. Type of virtualization – at the operating system level, and provides partial isolation from other VPS, which means that your node / miner can interfere with other VPS, for which you can get a ban from hosting. Not recommended to put miners, nodes with high traffic consumption, nodes with high hardware requirements.
VDS – reserving server resources, using hardware virtualization (that is, at the hardware level). More expensive than VPS, but the isolation is complete. Not a dedicated server (DS), but you can already put nodes with high iron requirements and miners on the CPU.
Dedicated is the most expensive type of server rental, but also the most flexible. You can choose CPU (e.g. Ryzen, Intel), drive type (NVMe, SSD, SATA), choose a raid (or change it yourself when installing), you can overclock the processor, if you want. I’m sure there are other cardinal possibilities, that dedicated server provides, unlike VPS and VDS.
What hosting to choose?
If I need a VPS
DigitalOcean.com – fast and convenient foreign service;
If I need DS:
OVH.com – expensive foreign service with good reviews;
ReliableSite.Net – expensive foreign service with the ability to pay extra for “mining” and not to have problems with bans.
HostKey.com – an expensive foreign service with the possibility of renting a dedicat with a video card.
Don’t forget, that nobody forbids using free trial periods from Amazon or Google Cloud.
I have listed only the hosting services I use. There are a huge number of them with different advantages and disadvantages. By trying them out, I have settled on the above services. No one limits your choice, you can rent servers at any hosting service you want.
Next I will show you how to buy at DigitalOcean.com.
How to set up DigitalOcean hosting?
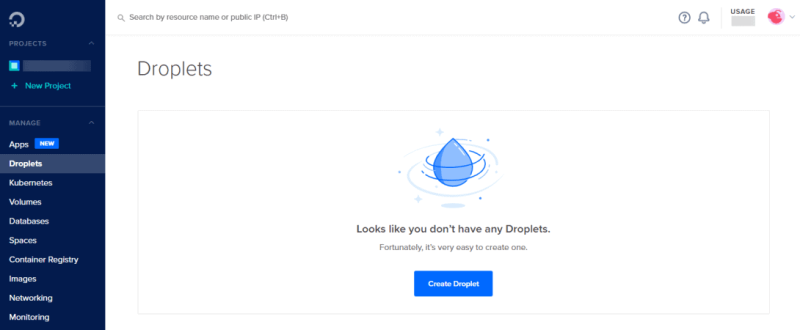
The first thing you need to do is to register an account. In the tab “Billing” bind the card. Go to the tab “Droplets” and click “Create Droplet”:
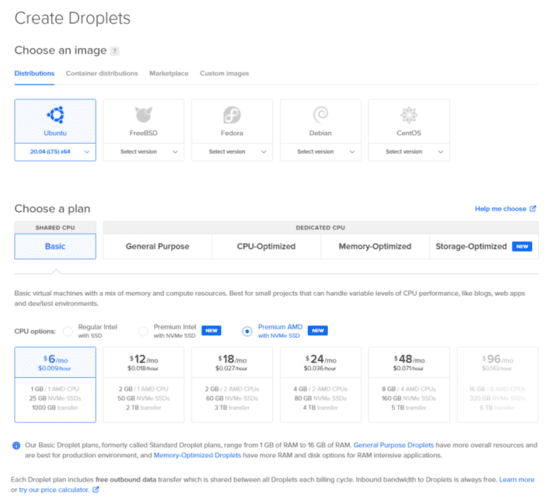
Then select the desired configuration:
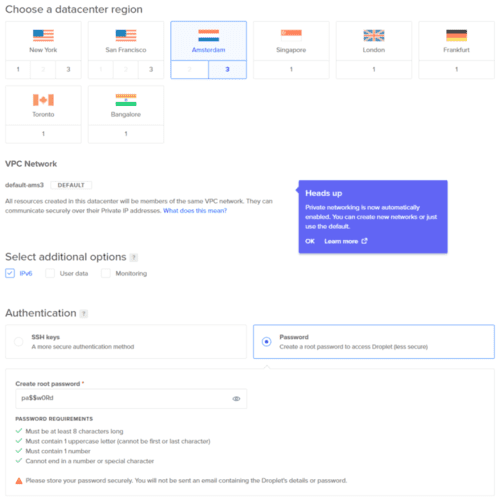
Choose a server location, add IPv6 if necessary, set a password to connect to the server:
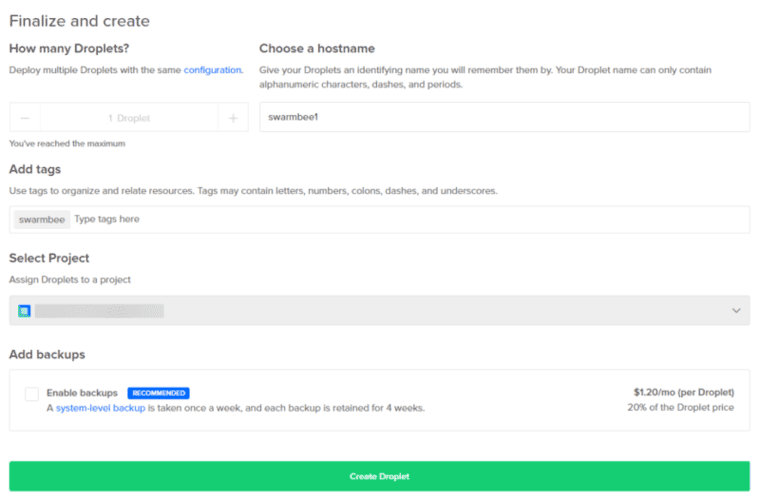
Choose “hostname” – the name of the server, type “tags” – for a quick search, and choose a project. “Create Droplet:
We are waiting for the order to be processed:
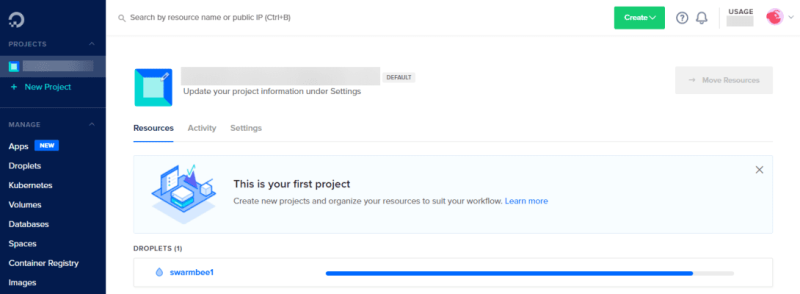
In the tab of the newly created server you can manage it – reinstall the OS, connect a dynamic IP, create backups, edit the hardware configuration:
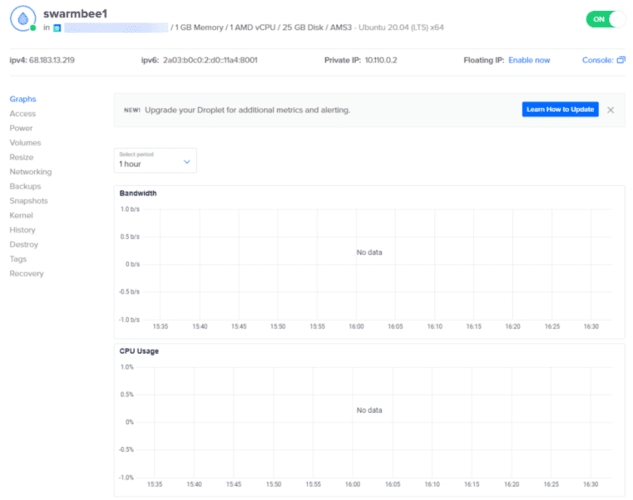
To connect to a server we need to know its IP and password. In cases where we connect to a graphical shell server, also the port.
Connecting to the server
Now we are left with the hardest part: connecting to the server and “raising” a node. Connecting to the server can be done in different ways. I prefer to use MobaXterm to manage my remote machines.
If you understand how to connect to the server, you can move on to installing the node itself. The guide (step-by-step instructions) for installing a node on the server is unique each time.
All that’s left now is to execute the “step-by-step” commands from the chosen guide and get your first node as a result.
MobaXterm guide
We will consider in details the program MobaXterm: what it is, where to download it, how to install it and how to configure it for comfortable work with remote servers.
MobaXterm is a program designed for remote administration of computers and servers. With its help users can perform almost any operations with remote systems.
The terminal built into the program allows you to execute Unix commands via Bash shell scripts. MobaXterm also includes a tool for working with macros, which can be run simultaneously on several systems.
The program is conditionally free. The home version is enough for our needs. At the moment, the program is only adapted to Windows OS. Download the latest version from the official site and install it like a normal program: next, next, next, install.
Program settings
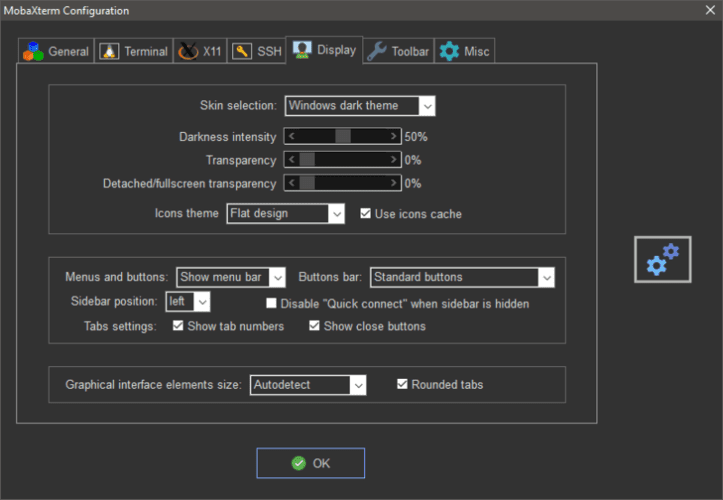
Launch mobu and go to Settings > Configuration > Display. Choose a theme, icons, etc. You can play around and adjust everything to suit you. The choice is poor, but there is a dark theme for trashy cryptans. Here’s what I came up with:
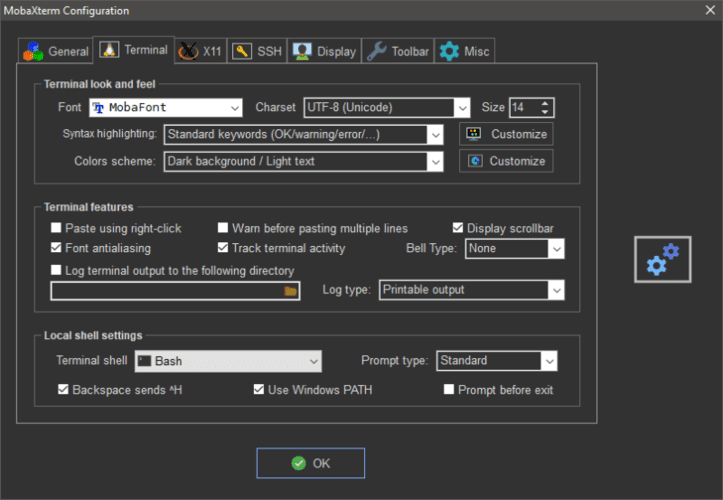
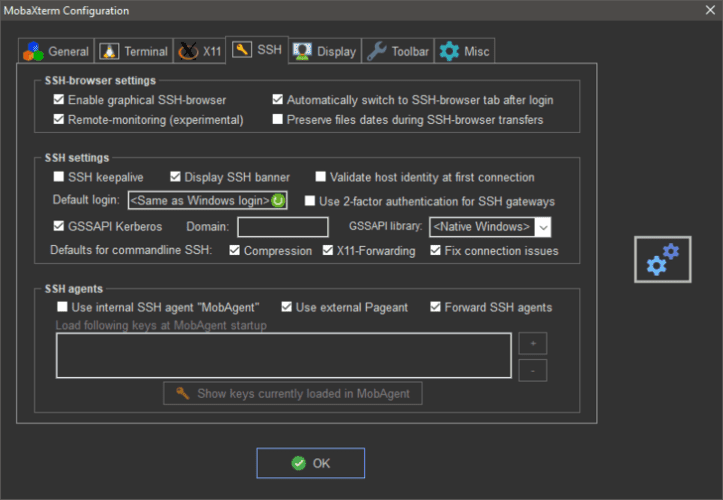
In the SSH tab, click the Remote-monitoring checkbox. This feature allows you to monitor the server load in real time:
Program Features
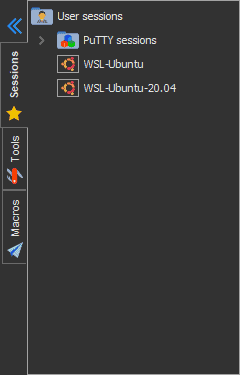
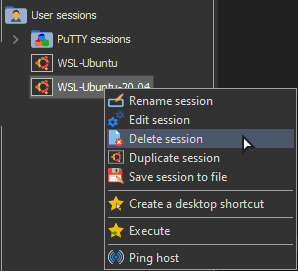
There are 2 nice tabs on the left side of the screen, Sessions and Macros. Go to the Sessions tab and delete the default sessions:
Creating a session
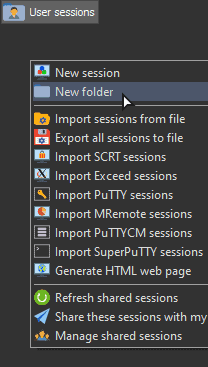
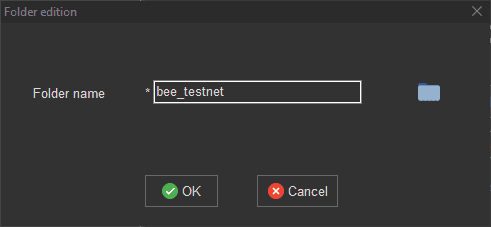
For example, there’s a Swarm Bee event going on right now and I want to set up some nodes to participate in that event. Create a folder with the name of the node or testnet in which we want to participate by right-clicking on an empty space:
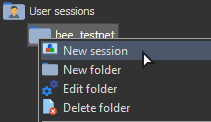
Next, right-click on the newly created folder to add the first session to it:
Choose the type of session. For me it is SSH:
When connecting to a server with Windows OS – choose RDP.
When connecting to Linux OS with a graphical shell – VNC.
When connecting to Linux OS without graphical shell – SSH.

Enter the IP of our server into the first form, edit the session name (to quickly find the right one in the future), edit the icon if desired, and add a link to the session to the desktop:
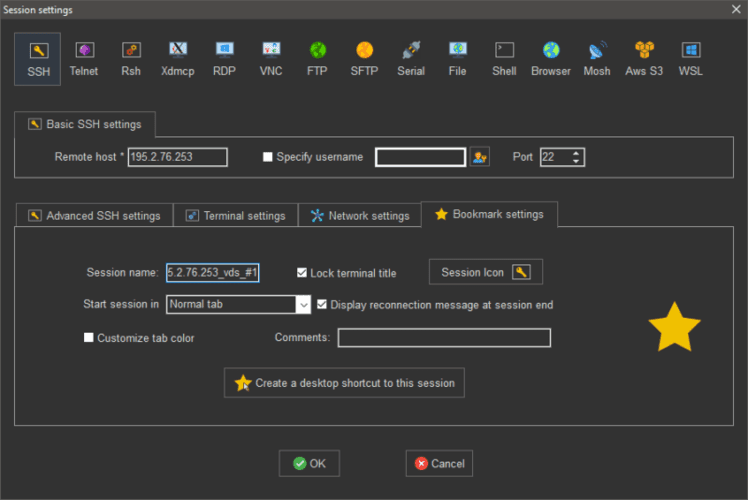
When everything is set up, click OK. This will open our terminal:

Enter your login (usually root) and password. The password is better copied from the server information and just paste into the terminal.
To paste any text into the terminal, you have to click the mouse wheel. “Ctrl + V” in MobaXterm is not a keyboard shortcut for pasting text. By default, the mouse wheel is responsible for this function.
The password is not displayed when you type into the terminal. You paste it in with the scroll wheel, hit Enter. That’s it, you are logged in.
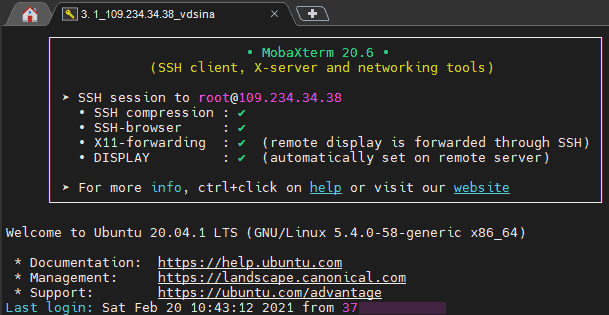
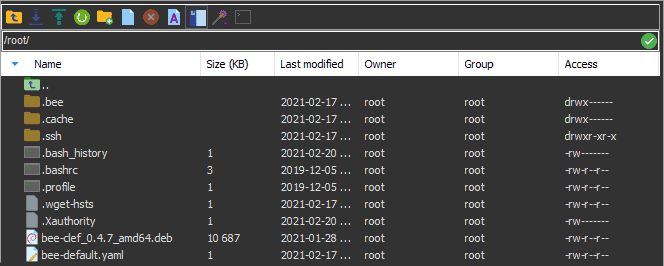
The left side of the screen will open a file manager, analogous to Windows Explorer.
In this box you can conveniently upload files to the server, download entire folders from the server to your local machine, create files and directories – in general, everything that you can do on a regular machine, you can now do on the server, literally in a couple of clicks.
If you do not interact with the terminal window for a long time, the session will break. To restart it, press the “R” key.

Macros
Macro is a thing that allows you to record all your actions in one session (for example, entering all commands to install some node) and apply all commands recorded in the macro in another session, which saves a lot of time.
For example, you want to install 3 Swarm Bee nodes. Turn on macro recording:
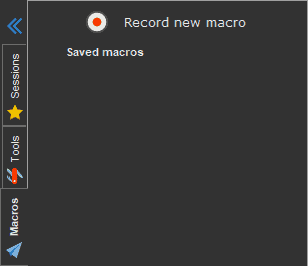
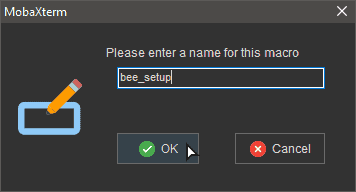
Enter all the commands to install, configure and run the node, stop recording a macro, think of a name for it and save it:
![]()
